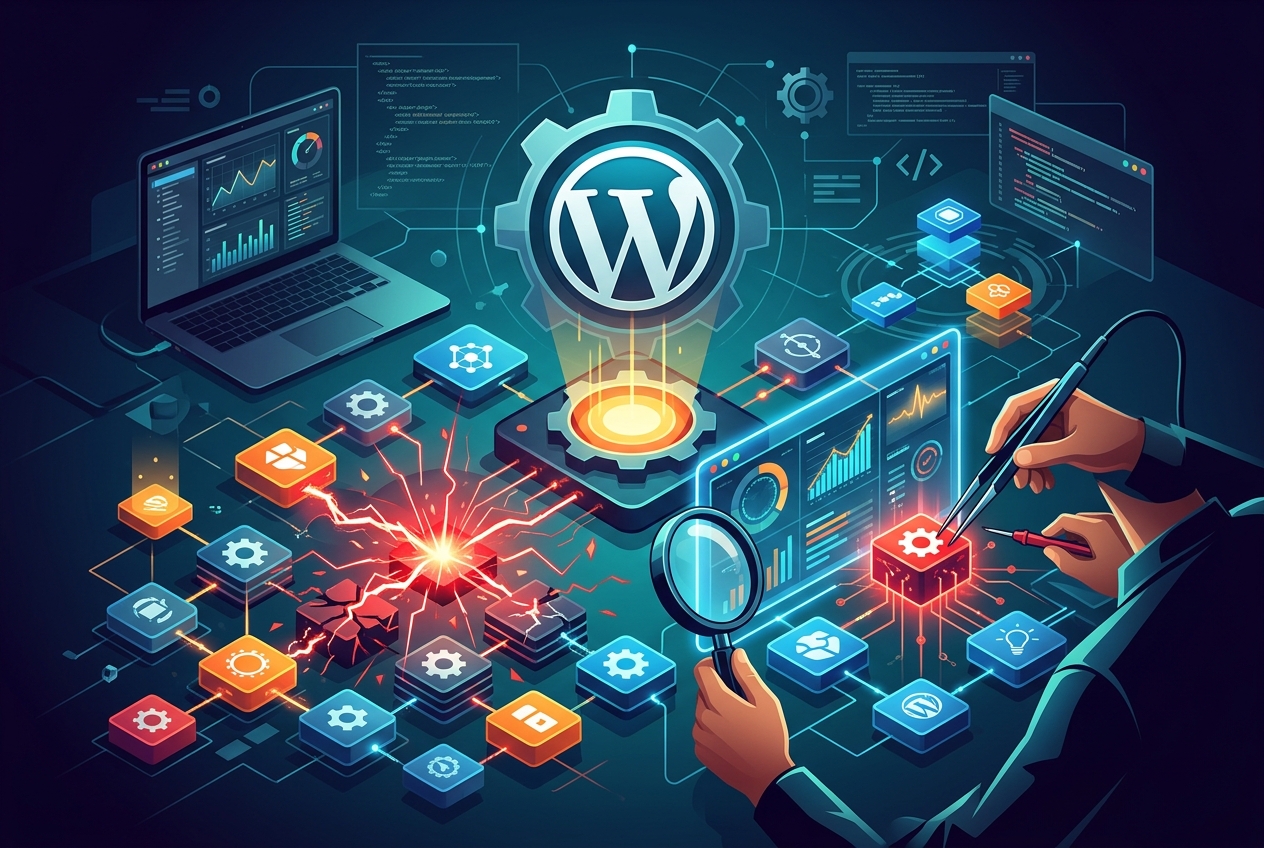
Understanding and Addressing Plugin Conflicts
WordPress plugins are useful. They allow you to add almost any feature to your site. However, problems sometimes arise.
Plugin conflicts are a frequent source of trouble. They can range from small annoyances to complete website failures. Have you ever encountered the “white screen of death?” A plugin conflict could be the reason.
At www.seos7.com, we understand this frustration. We provide tools that improve your SEO and help maintain a smoothly running site.
Consider plugins as instruments in an orchestra. When they harmonize, the music sounds great. If one instrument is out of tune, the entire performance suffers.
Here’s what you should know about plugin clashes:
- What they are: When two or more plugins (or a plugin and your theme) attempt the same task, or their code clashes.
- Why they happen: Different developers create plugins, and their code isn’t always compatible.
- What they can do: Create errors, break functionality, or even crash your entire site.
Do not worry! You can learn to diagnose and resolve plugin conflicts. We’ll guide you through the process, step by step.
Remember, prevention is best. Keeping your plugins updated is key. With www.seos7.com, you can watch your site’s health and spot potential problems before they become serious. Our Site Audit feature scans your site for issues automatically. It can detect potential plugin conflicts.
Plugin conflicts are a common WordPress issue. They occur when plugins, or a plugin and your theme, try to run conflicting code. It’s like two cooks trying to use the same ingredient in opposing ways!
Why does this occur? Here’s a breakdown:
- Resource Conflicts: Two plugins might compete for the same resources, like database access or JavaScript libraries.
- Poorly Written Code: Not all plugins are well-made. Poor code in one plugin can interfere with others.
- Incompatibility After Updates: A plugin update might introduce new code that clashes with existing plugins or your theme.
WordPress is a complex system. Plugins are like puzzle pieces. Most fit well together, but sometimes pieces don’t belong. That’s where conflicts begin.
At www.seos7.com, we offer proactive solutions. Our Site Audit feature helps you find potential plugin issues before they worsen. We scan your site for common conflicts and offer actionable advice to keep things running smoothly.
The following table summarizes common conflict causes:
| Cause | Description |
|---|---|
| Resource Conflicts | Plugins compete for the same resources. |
| Poor Code | Poorly written plugin code interferes with others. |
| Update Incompatibility | Updates introduce conflicting code. |
Understanding these potential causes is the first step in troubleshooting. Knowing what to look for can save time.
We’re here to help you understand WordPress. Our goal is to give you the tools and knowledge to keep your site healthy and working well.
Recognizing Plugin Conflict Symptoms
Your WordPress site isn’t behaving as expected. How can you tell if a plugin conflict is to blame? Symptoms differ, but some signs are common.
Plugin conflicts aren’t always obvious; they can be minor or major. Paying attention to the details is key.
Here are some common signs:
- Weird Visual Issues: Layouts are broken, elements are misaligned, or images are missing.
- Functionality Problems: Forms won’t submit, buttons don’t work, or features disappear.
- Error Messages: PHP, JavaScript, or database connection errors appear.
- Slow Loading Times: Website speed suddenly decreases.
- The White Screen of Death (WSOD): A blank white screen appears without an error message. This is the most severe symptom.
Consider whether you can still access your WordPress admin area. This determines how you troubleshoot.
Plugin conflicts generally appear in two ways:
- Errors with Admin Access: The site has issues, but you can still log in and make changes.
- The White Screen of Death (No Admin Access): The site is completely down, and you can’t access the admin panel.
If you can still drive the car (access the admin panel), you can try fixing the problem. If the car is totaled (WSOD), you’ll need a tow truck (more advanced troubleshooting).
These symptoms can also stem from other issues:
- Outdated plugins or themes
- Server problems
- Incorrect configurations
However, if basic troubleshooting doesn’t work, a plugin conflict is likely.
Here’s a quick summary:
| Symptom | Severity | Admin Access |
|---|---|---|
| Visual Issues | Minor | Yes |
| Functionality Problems | Moderate | Yes |
| Error Messages | Moderate | Yes |
| Slow Loading Times | Moderate | Yes |
| White Screen of Death | Severe | No |
Now you know what to look for. We can move on to troubleshooting, starting with fixing conflicts when you still have admin panel access.
Troubleshooting Plugin Conflicts with Admin Access
You have a problem, but you can still log in. That’s good! Fixing plugin conflicts with admin access requires a methodical approach.
The goal is to isolate the problem plugin (or theme) and resolve the conflict. This usually means deactivating plugins one by one to see which one causes the issue.
Here’s how to do it:
- Clear Your Browser Cache: Old cached files sometimes cause issues. Clear your browser’s cache and cookies to ensure you see the latest version of your site.
- Update Everything: Ensure WordPress, your theme, and all plugins are current. Outdated software often causes conflicts.
- Deactivate All Plugins: This is the key. Deactivate all plugins to see if the problem disappears.
- Reactivate One by One: Reactivate each plugin individually, checking your site after each activation. When the problem returns, you’ve found the culprit.
- Switch to a Default Theme: If the issue isn’t a plugin, try switching to a default WordPress theme (like Twenty Twenty-Four). This helps determine if the theme is the problem.
- Report the Bug: After identifying the conflicting plugin or theme, report the bug to the developer. They might fix it in a future update.
Clear Your Browser Cache and Update WordPress
Browsers save website files so pages load faster. Occasionally, these saved files clash with recent changes. Clearing your browser cache ensures you view the newest version of your site.
To clear the cache in Chrome:
- Press
Ctrl + Shift + Delete(orCmd + Shift + Deleteon Mac). - Select “Cached images and files.”
- Click “Clear data.”
Old plugins and themes pose a security threat and may trigger conflicts. Keeping everything current is important for site health.
Visit your WordPress dashboard and look for updates in the “Updates” area. Regularly updating themes and plugins helps maintain a stable and secure website.
Isolating the Problem: Plugin Deactivation and Reactivation
The most direct approach involves deactivating all plugins. This helps determine if a plugin conflict triggers the issue.
Navigate to “Plugins” > “Installed Plugins.” Select all plugins. From the “Bulk actions” menu, choose “Deactivate” and click “Apply.”
Reactivate each plugin one at a time. After each activation, check your site. Note when the problem returns. The plugin activated last likely causes the conflict.
The process can be tedious. However, it remains the most dependable method for pinpointing the source.
Test a Default Theme
If deactivating plugins doesn’t solve the problem, your theme could be the source. Activate a default WordPress theme, such as Twenty Twenty-Four, to check.
Navigate to “Appearance” > “Themes” and select a default theme.
Report Bugs to Developers
After pinpointing the problematic plugin or theme, tell the developer about the bug. They can then address it in a later release.
Developer contact details are typically found on the plugin or theme’s page within the WordPress repository.
Here’s a quick troubleshooting checklist:
- [ ] Clear Browser Cache
- [ ] Update Everything
- [ ] Deactivate All Plugins
- [ ] Reactivate One by One
- [ ] Switch to Default Theme
- [ ] Report the Bug
These steps should help you find and fix most plugin conflicts. If problems continue, get assistance from a WordPress professional.
Clear Your Browser Cache
Sometimes, your browser retains older code. This can prevent new code from displaying correctly, especially after plugin updates. The browser has outdated information.
Clearing the cache ensures you see the most current version of your site. Consider it a fresh start for your browser.
This simple action can often resolve minor display problems. Try this before more complex troubleshooting!
Here’s how to clear your cache on Chrome:
- Press
Ctrl + Shift + Delete(Windows) orCmd + Shift + Delete(Mac). - Select “Cached images and files”.
- Click “Clear data”.
The process is similar for other browsers. Look for “Clear browsing data” or “Clear history” in your browser’s settings.
Do not dismiss the effect of a clean cache! This quick fix can save time and frustration.
Update Plugins to Avoid Conflicts
Outdated plugins can create conflicts and security problems. They can become a liability for your website.
Keeping plugins updated is a critical first step in troubleshooting. Plugin developers release updates regularly to fix bugs, improve performance, and patch security holes.
Here’s how to update your plugins:
- Log in to your WordPress admin area.
- Look for the “Updates” icon in the left-hand menu. It’s usually near the top.
- Click on the “Updates” icon.
- You’ll see a list of available updates for WordPress, your themes, and your plugins.
- Select the plugins you want to update (or select all of them).
- Click the “Update Plugins” button.
It’s that simple! Check for updates regularly. Automatic updates can ensure your plugins are current.
Important: Back up your website before updating. If something goes wrong, you can restore your site to its previous state.
Here’s a quick checklist:
- [ ] Log in to your WordPress admin area.
- [ ] Check for available updates.
- [ ] Back up your website.
- [ ] Update your plugins.
Updated plugins reduce the risk of conflicts and improve your website’s security and speed.
WordPress Version and Theme Conflicts
Sometimes, the problem stems not from the plugins themselves, but from their interaction with your WordPress version. An older plugin might not function correctly with the latest WordPress update, and vice-versa.
Consider it like trying to run a recent application on outdated hardware. It might not work at all. To check for WordPress version conflicts:
- Use a Compatibility Plugin: Plugins such as “Better Plugin Compatibility Control” can point out plugins that don’t work with your current WordPress version.
- Manual Check: In your WordPress dashboard, go to the “Plugins” section. Check each plugin for details about its compatibility with different WordPress versions.
If you find incompatible plugins, turn them off. Then, see if the problem goes away.
It’s a process of elimination. Ruling out WordPress version conflicts helps narrow down the problem’s source.
Here’s a quick checklist:
- [ ] Use a compatibility plugin or manually check plugin compatibility.
- [ ] Deactivate any incompatible plugins.
- [ ] Check your website for improvements.
Important: Back up your website before deactivating plugins. This allows you to easily restore your site if something goes wrong.
If deactivating incompatible plugins fixes the issue, you have options:
- Find a different plugin that works with your WordPress version.
- Update WordPress (if you’re using an older version).
- Contact the plugin developer and ask them to update the plugin.
Addressing WordPress version conflicts helps ensure your plugins work and your website runs smoothly.
A theme might also be the source of trouble. A theme conflict can lead to unexpected visual and functional problems on your WordPress site.
The simplest way to check for a theme conflict is to temporarily switch to a default WordPress theme. These themes are simple and compatible, making them useful for troubleshooting.
To check for theme conflicts:
- Go to “Appearance” > “Themes” in your WordPress dashboard.
- Activate a default WordPress theme, such as Twenty Twenty-One, Twenty Twenty-Two, or Twenty Twenty-Three.
- See if the issues disappear.
If the issues disappear after switching to a default theme, your original theme likely causes the conflict.
What if you want to keep your original theme? Here’s how to further isolate the problem:
- Reactivate your previous theme.
- Turn off your plugins one by one, checking your site after each deactivation.
- If the issues disappear after deactivating a specific plugin, that plugin likely conflicts with your theme.
Once you’ve found the conflicting plugin, you can replace it or contact the plugin developer for support.
Here’s a quick checklist:
- [ ] Activate a default WordPress theme.
- [ ] Check your website for improvements.
- [ ] If the issues disappear, reactivate your previous theme.
- [ ] Deactivate plugins one by one to isolate the conflict.
Important: Before changing your theme or plugins, back up your website. This allows you to easily restore your site if something goes wrong.
Checking for theme conflicts systematically can help identify and resolve common WordPress issues.
Check for Plugin vs Plugin Conflicts
You’ve ruled out theme and WordPress version issues. The problem likely arises from a clash between two or more plugins. It’s time to investigate.
The process is methodical, but it works. Deactivate all your plugins, then reactivate them one by one to pinpoint the source of the issue.
- Deactivate All Plugins: Go to “Plugins” > “Installed Plugins”. Select all plugins, choose “Deactivate” from the “Bulk actions” menu, and click “Apply”.
- Check Your Site: After deactivating all plugins, check your website. If the issue is resolved, a plugin conflict is the cause.
- Reactivate One by One: Reactivate each plugin individually, checking your site after each activation. Patience is key here.
- Identify the Culprit: When the error reappears after activating a specific plugin, you’ve found the conflicting plugin. Note which one it is.
- Address the Conflict: Once you’ve identified the conflicting plugin, you have options:
- Replace the plugin with an alternative.
- Contact the plugin developer for support.
- Try to identify the specific setting or feature causing the conflict and disable it.
Check your site after each activation. This helps you catch the exact moment the conflict arises.
Here’s a quick checklist to help you stay organized:
- [ ] Deactivate all plugins.
- [ ] Check your site.
- [ ] Reactivate plugins one by one.
- [ ] Identify the conflicting plugin.
- [ ] Address the conflict.
This process can take time, but it’s the most reliable way to identify plugin vs plugin conflicts. Be patient, and you’ll find the cause.
After identifying the conflicting plugin, consider these questions:
- Is the plugin essential to your site’s functionality?
- Are there alternative plugins that offer similar features?
- Has the plugin been recently updated?
These answers will help you decide on the best approach. Replacing a problematic plugin with a well-supported alternative is sometimes the easiest solution.
Recovering from the White Screen of Death
The white screen of death (WSOD) is a blank, empty page where your website should be. Even worse, you might not be able to access your WordPress admin panel. Don’t panic; recovery is still possible.
When you’re locked out, you’ll need to use FTP (File Transfer Protocol) or your hosting provider’s file manager. These tools give you direct access to your website’s files.
Here’s the general process:
- Access Your Files: Use FTP or your hosting provider’s file manager to connect to your website’s server.
- Locate the Plugins Folder: Go to the
wp-contentdirectory, then find thepluginsfolder. - Deactivate Plugins Manually: Rename the plugin folders. This deactivates them.
- Test Your Site: After deactivating all plugins, check if your site is back online.
- Identify the Culprit: Rename the plugin folders back to their original names, one by one, testing your site after each rename. When the WSOD returns, you’ve found the problematic plugin.
Accessing and Locating Your WordPress Files
To begin, you’ll need an FTP client such as FileZilla or Cyberduck. Obtain your FTP credentials (host, username, password) from your hosting provider.
Many hosting providers also include a file manager in their control panel. This provides a web-based way to manage your files.
After connecting with your chosen method, go to the root directory of your WordPress installation. This is often public_html or www. Inside, you’ll see the wp-content folder, and within it, the plugins folder.
The plugins folder holds a separate folder for every plugin you have installed.
Deactivating Plugins for Testing
To deactivate a plugin, rename its folder. A simple way is to add -deactivated to the end of the folder name. For example, rename my-plugin to my-plugin-deactivated.
Deactivate all plugins by renaming all the folders in the plugins directory.
With all plugins deactivated, access your website in a browser. If the white screen of death disappears, a plugin caused the problem.
Identify the Problem Plugin
Rename the plugin folders back to their original names, one at a time. Check your website after each rename. When the White Screen of Death (WSOD) returns, you’ve located the problematic plugin.
Once you’ve identified the conflicting plugin, you can delete it if it’s not critical. You can also contact the plugin developer for support.
Here’s a checklist to guide you:
- [ ] Access your files via FTP or file manager.
- [ ] Locate the
wp-content/pluginsfolder. - [ ] Rename all plugin folders to deactivate them.
- [ ] Test your site.
- [ ] Rename plugin folders back to their original names, one by one, to identify the culprit.
Important: Exercise caution when working with your website’s files. Incorrect changes can cause serious problems. If you’re not comfortable with FTP or file managers, get help from a WordPress expert.
Recovering from the WSOD can be frustrating. However, by following these steps, you can often diagnose and fix the issue. Be patient and methodical.
Here’s a table summarizing the process:
| Step | Action |
|---|---|
| 1 | Access files via FTP or file manager. |
| 2 | Locate wp-content/plugins. |
| 3 | Rename plugin folders to deactivate. |
| 4 | Test your site. |
| 5 | Rename folders back, one by one, to identify the culprit. |
By systematically deactivating and reactivating plugins, you can resolve the WSOD and restore your website.
Accessing Files to Troubleshoot
Are you locked out of your WordPress dashboard? Don’t worry! You can still troubleshoot plugin issues by directly accessing your website’s files.
This involves using either FTP (File Transfer Protocol) or your hosting provider’s file manager. Both let you view, edit, and manage your website’s files on the server.
Using FTP
FTP is a standard network protocol for transferring files between computers. To use it, you’ll need:
- An FTP client (e.g., FileZilla, Cyberduck, WinSCP). These are free to download.
- Your FTP credentials:
- Host (or server address)
- Username
- Password
- Port (usually 21)
Your hosting provider will supply these credentials. Find them in your hosting account dashboard or contact their support team.
Once you have your credentials:
- Open your FTP client.
- Enter your host, username, password, and port.
- Click “Connect.”
Your FTP client will then connect to your website’s server, allowing you to browse your files.
Using File Manager
Most hosting providers offer a web-based file manager within their control panel (e.g., cPanel, Plesk). This is a graphical interface for managing your files directly in your browser.
To access your file manager:
- Log in to your hosting account.
- Look for a “File Manager” icon or link.
- Click on it to open the file manager.
The file manager will display your website’s files and folders in a user-friendly interface.
Locating the Plugins Folder
Whether you use FTP or file manager, the next step is to go to the plugins folder.
The path is usually:
/public_html/wp-content/plugins/
Or, if your WordPress installation is in a subdirectory:
/public_html/your-subdirectory/wp-content/plugins/
Once you’re in the plugins folder, you’ll see a separate folder for each installed plugin. This is where you’ll deactivate plugins manually.
Here’s a quick comparison of the two methods:
| Feature | FTP | File Manager |
|---|---|---|
| Software Required | FTP Client | Web Browser |
| Access | Direct server access | Web-based interface |
| Complexity | Slightly more technical | More user-friendly |
Choose the method you’re most comfortable with. Both FTP and file manager will allow you to access your website’s files and troubleshoot plugin issues.
Deactivating Plugins Manually
If you can access your website’s files, you can disable plugins by renaming their folders.
WordPress recognizes plugins by their folder names. Changing a folder’s name hides the plugin from WordPress, thus deactivating it.
Here’s how:
- Go to the
wp-content/pluginsdirectory using your FTP client or file manager. - You’ll see a list of folders; each represents a plugin.
- Rename each plugin folder by adding
-oldto the end. For example, changemy-plugintomy-plugin-old. - Repeat for all plugin folders.
That’s it. By renaming all the plugin folders, you deactivate all your plugins.
Important: Rename only the plugin *folders*, not the files *inside* the folders.
After renaming, check your website. If the white screen of death (or another issue) disappears, a plugin caused it.
Next, identify *which* plugin was the culprit. Rename the folders back to their original names, one by one, testing the site after each rename.
Here’s a quick checklist:
- [ ] Go to the
wp-content/pluginsdirectory. - [ ] Rename each plugin folder by adding
-oldto the end. - [ ] Check your website.
Renaming plugin folders deactivates plugins when you can’t access your WordPress admin panel. It’s a step in fixing the white screen of death and other plugin-related issues.
Consider it like putting tools away temporarily. Then, bring them back one at a time to see which one causes a problem.
Using the Health Check & Troubleshooting Plugin
The Health Check & Troubleshooting plugin helps diagnose WordPress problems. It can pinpoint issues without affecting your live site.
This free plugin, available in the WordPress repository, provides tools to find and fix common issues, like plugin conflicts. It’s helpful for any WordPress user.
The Health Check & Troubleshooting plugin:
- Performs Site Diagnostics: It runs tests to check for common problems, such as outdated software, PHP errors, and database connection issues.
- Provides Recommendations: Based on the diagnostics, it suggests ways to fix problems.
- Offers Troubleshooting Mode: This lets you test your site with all plugins disabled and a default theme activated, *without* affecting your visitors.
Installing and Using the Health Check Plugin
First, install and activate the Health Check & Troubleshooting plugin.
- Go to “Plugins” > “Add New” in your WordPress dashboard.
- Search for “Health Check & Troubleshooting”.
- Click “Install Now” and then “Activate”.
After activation, run a site diagnostics check.
- Go to “Tools” > “Site Health”.
- Review the “Status” and “Info” tabs.
- Note any critical issues or suggested fixes.
The “Status” tab gives a general idea of your site’s condition. The “Info” tab reveals more specific details about your WordPress setup.
Using Troubleshooting Mode to Find Conflicts
This is where the real work begins. Troubleshooting mode isolates plugin conflicts without disrupting the live site.
- Go to “Tools” > “Site Health” > “Troubleshooting”.
- Click the “Enable Troubleshooting Mode” button.
This mode deactivates all plugins and switches to a default theme, but only for your user session. Site visitors won’t notice any changes.
With troubleshooting mode active, reactivate plugins individually to pinpoint the conflict’s origin.
- Go to “Plugins” > “Installed Plugins”.
- Reactivate each plugin, checking your site after each activation.
- If the problem returns, the last plugin activated is the culprit.
After enabling each plugin, refresh the browser to see the latest version of your site.
Here’s a quick reference:
| Action | Location |
|---|---|
| Install Plugin | Plugins > Add New |
| Run Diagnostics | Tools > Site Health |
| Enable Troubleshooting Mode | Tools > Site Health > Troubleshooting |
| Reactivate Plugins | Plugins > Installed Plugins |
The Health Check & Troubleshooting plugin helps diagnose and fix WordPress problems. Its features allow quick identification of plugin conflicts, which helps keep a website running well.
Consider it a built-in WordPress expert.
Using Troubleshooting Mode
The Health Check & Troubleshooting plugin offers a useful “Troubleshooting Mode.” This feature creates a secure environment for diagnosing problems without affecting visitors to your site.
Here’s how it works:
- Isolation: It turns off all plugins and switches to a default WordPress theme like Twenty Twenty-Four, creating a clean slate.
- Session-Specific: These changes apply only to your logged-in session. People visiting your website see the normal, live version.
- Controlled Reactivation: You can reactivate plugins and your theme individually to find the source of the problem.
Consider it a controlled experiment. You isolate variables to pinpoint the cause.
To enable Troubleshooting Mode:
- Navigate: In your WordPress dashboard, go to “Tools” > “Site Health” > “Troubleshooting”.
- Enable: Click the “Enable Troubleshooting Mode” button.
- Reactivate: Go to “Plugins” > “Installed Plugins.” Reactivate each plugin one at a time, checking your site after each activation.
- Identify: When the problem returns, the last plugin you activated is likely the cause.
- Test Theme: If reactivating all plugins doesn’t reveal the issue, activate your theme while still in Troubleshooting Mode. If the problem returns, your theme is the source.
Here’s a visual:
Remember to refresh your browser after each activation to see the changes.
A key benefit is the ability to safely test plugin and theme combinations without disrupting the experience for people visiting your website. It’s a way to diagnose WordPress issues.
Once you’ve found the conflicting plugin or theme, you can resolve the issue by:
- Replacing the plugin with an alternative.
- Contacting the plugin or theme developer for support.
- Updating the plugin or theme.
Troubleshooting Mode can be a valuable tool. Use it to keep your WordPress site running smoothly.
Preventing Plugin Conflicts
Troubleshooting is helpful, but avoiding plugin conflicts altogether is ideal. Prevention can keep your WordPress site healthy.
Think of it this way: a regular check-up is better than emergency surgery. Taking action early minimizes the risk of serious problems later.
Here’s how to reduce plugin conflicts:
- Choose Wisely: Select plugins from trusted developers. Look for plugins with high ratings, positive reviews, and frequent updates.
- Stay Updated: Keep your plugins, themes, and WordPress core current. Updates often include bug fixes and compatibility improvements.
- Test in Staging: Before making changes to your live site, test them in a staging environment. This allows you to find potential conflicts without disrupting visitors.
- Limit Plugins: Install only the plugins you truly require. The more plugins you have, the higher the risk of conflicts.
- Check Compatibility: Before installing a new plugin, check that it works with your current WordPress version and other installed plugins.
Select Reliable Plugins
Plugins vary significantly in quality. Some have solid code and consistent upkeep. Others have poor construction and lack support. Selecting dependable plugins matters.
Consider these factors:
- High Ratings: Plugins with ratings of 4 stars or higher often perform well.
- Positive Reviews: User reviews offer insights into plugin performance.
- Frequent Updates: Regular updates often mean better compatibility with the newest WordPress version.
- Active Support: A responsive developer can assist if problems arise.
Plugin selection resembles buying a car. You likely wouldn’t choose a vehicle from an unreliable seller without a warranty. Apply the same logic to plugins.
Maintain Current Versions
Old plugins invite conflicts and security risks. Keeping plugins, themes, and the WordPress core current is key for site health.
Activate automatic updates for plugins and themes to ensure they remain current. You can also check for updates manually in the WordPress dashboard.
Important: Back up your website before any update. A backup allows for easy restoration if issues occur.
Test in a Staging Area
A staging area mirrors your live website. Use it to test changes safely. This way, you can spot conflicts before they affect visitors.
Many hosting companies provide staging areas in their hosting plans. Or, you can set one up yourself with a plugin.
Before adding a plugin, updating one, or changing anything major on your site, experiment in the staging area first.
Reduce the Number of Plugins
More plugins increase the chance of conflicts. Install only what you truly require.
Before adding a new plugin, consider if it’s essential. Could you get the same result with code or by editing your theme?
Periodically check your plugins. Delete any you don’t use anymore.
Preventing Plugin Conflicts
Before installing a new plugin, confirm it works with your current WordPress version and other installed plugins.
The plugin’s page in the WordPress repository usually indicates compatibility with different WordPress versions. You can also use a plugin compatibility checker to spot potential conflicts.
Plugin updates are also vital for a stable WordPress site. Think of them as routine maintenance. Neglecting them can cause problems.
Updates often include bug fixes, which resolve underlying code issues that can cause conflicts. They also patch security vulnerabilities, shielding your site from threats.
Here’s a checklist for preventing plugin conflicts and keeping plugins current:
- [ ] Choose plugins from reputable developers.
- [ ] Keep your plugins, themes, and WordPress core up to date.
- [ ] Test changes in a staging environment.
- [ ] Limit the number of plugins you install.
- [ ] Check plugin compatibility before installing.
- [ ] Check for plugin updates regularly.
- [ ] Enable automatic updates (if possible).
- [ ] Back up your site before updating.
Following these tips significantly reduces the risk of plugin conflicts. It also helps keep your WordPress website running smoothly. Prevention is always better than cure.
Keeping plugins current is a straightforward yet effective way to maintain site stability. It’s like taking a daily vitamin to stay healthy.
Make it a habit to check for plugin updates regularly from your WordPress dashboard. Go to “Dashboard” > “Updates” to see what’s available. Select the plugins you want to update and click “Update Plugins”.
Consider turning on automatic updates for your plugins. This ensures they’re always current without manual checks.
These proactive measures are key to a stable and conflict-free WordPress experience. It’s a small effort that yields big results.
Here’s a table summarizing these preventative measures:
| Measure | Description |
|---|---|
| Choose Wisely | Select reputable plugins with high ratings and frequent updates. |
| Stay Updated | Keep plugins, themes, and WordPress core up to date. |
| Test in Staging | Test changes in a staging environment before applying them to your live site. |
| Limit Plugins | Only install necessary plugins. |
| Check Compatibility | Verify plugin compatibility before installation. |
| Bug Fixes | Resolves code issues that cause conflicts. |
| Security Patches | Protects your site from vulnerabilities. |
| Compatibility | Ensures plugins work well with the latest WordPress version. |
| Performance Improvements | Improves plugin performance for a faster site. |
Test in a Staging Environment
Before updating plugins or themes, set up a staging environment. Consider it a practice run. A staging environment mirrors your live website. It lets you test changes safely, without affecting visitors.
Why use a staging environment?
- Identify Conflicts: Find plugin or theme conflicts *before* they damage your live site.
- Safe Testing: Try new features and settings without risk.
- Minimize Downtime: Keep updates smooth, reducing downtime.
Many hosting providers offer one-click staging. Check your hosting account. If not, plugins can create a staging site.
The process is straightforward:
- Create a staging environment.
- Update or change the staging site.
- Thoroughly test for conflicts or errors.
- If it works, deploy the changes to your live site.
Testing in staging is smart for any WordPress website. It’s a safety net, protecting your site from problems.
Use this checklist:
- [ ] Create a staging environment.
- [ ] Test updates on the staging site.
- [ ] Verify function and check for conflicts.
- [ ] Deploy changes to the live site.
With a staging environment, you can confidently change your website. You’ll reduce the risk of conflicts and downtime. It’s a good investment in your site’s health.
Using SEOS7 for Website Maintenance
A smoothly running WordPress site is vital. Downtime and errors can harm your SEO and user experience. SEOS7 focuses on tools that improve your SEO and help you keep your website healthy.
Here’s how SEOS7 can help you simplify your work and reduce plugin issues:
- SEO Tools: Our platform offers SEO tools, including site audits, content help, and keyword research.
- Automated Tasks: We automate SEO tasks, freeing you to focus on other things.
- Site Health Monitoring: Our site audit feature helps you spot issues, including plugin conflicts, before they become problems.
By automating SEO and providing site health information, SEOS7 helps you maintain a stable, optimized WordPress website.
Think of SEOS7 as your SEO and website maintenance solution. We help you expand your business without technical stress.
SEOS7 benefits:
- Less work through automation.
- Early issue detection.
- Better website health and performance.
With SEOS7, focus on content and audience engagement. We handle the technical details.
Mastering WordPress Troubleshooting
Diagnosing and fixing plugin conflicts is a key skill for any WordPress user. Think of it as learning basic car maintenance. It might seem hard initially, but with practice, you’ll gain confidence.
By following these steps, you can confidently address most plugin-related issues. Stay calm, use a methodical approach, and use the available resources.
Here’s a quick review of the main points:
- Understand the Symptoms: Recognize the signs of a plugin conflict.
- Isolate the Problem: Identify the conflicting plugin or theme through elimination.
- Leverage Tools: Use tools like the Health Check & Troubleshooting plugin.
- Prevent Conflicts: Choose reputable plugins, keep everything updated, and test in a staging environment.
At www.seos7.com, we aim to provide the resources you need to thrive with WordPress. Our Site Audit feature helps find potential issues before they escalate.
We believe a healthy website is vital for SEO. We offer a suite of SEO tools that improve your rankings and help you maintain a stable, well-tuned WordPress website.
Our platform provides:
- Automated Site Audits: Find potential plugin conflicts and other technical problems.
- Actionable Recommendations: Receive clear recommendations for fixing identified problems.
- Proactive Monitoring: Stay informed about your site’s health and performance.
We want to give you the resources to manage your WordPress website. Whether you’re an experienced developer or just starting, our platform can assist you in reaching your objectives.
Ready to improve your WordPress website? Start your free trial!
Basic troubleshooting knowledge is valuable. With the proper resources and a careful approach, you can overcome any WordPress issue.