
Want to connect Google Tag Manager to your Shopify store? This article includes the steps and code you'll need to add Google Tag Manager and send purchase events to Google Analytics 4 (GA4).
How to create an account on Google Tag Manager
First you will go to this Link Through it, you will register with your Gmail account in GTM or Google Tag Manager, then you will choose the Gmail account in which you want the Google Tag Manager account to appear.
This screen will appear in front of you, through which you will choose Create Account or create an account.
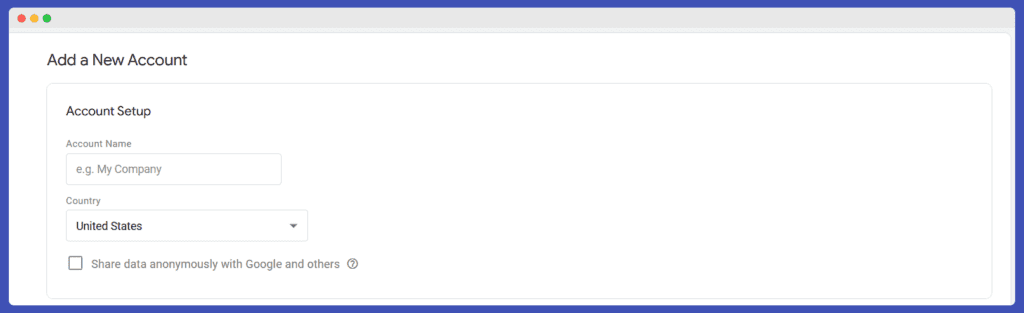
After clicking on it, this screen will appear in front of you. You will write the name of the account. It is preferable to write the name of the site in this field, “Account Name,” and then you will choose the country that the site targets. This choice is important because it will send events according to the time zone of the country to which your site belongs.
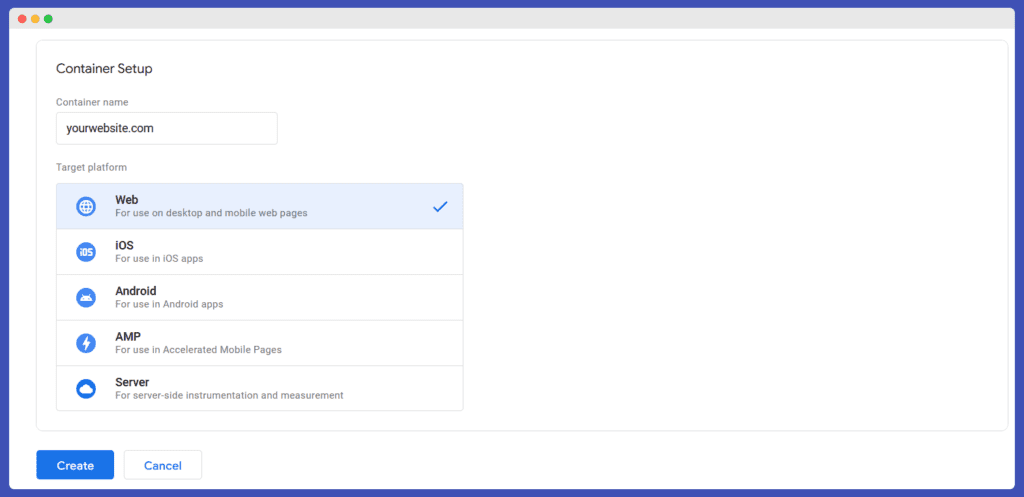
You will add your website and then choose Web in our case, because we want to track events for your store, then click Create.
After agreeing to Google's terms, you will see this screen
How to install GTM code within your Shopify store
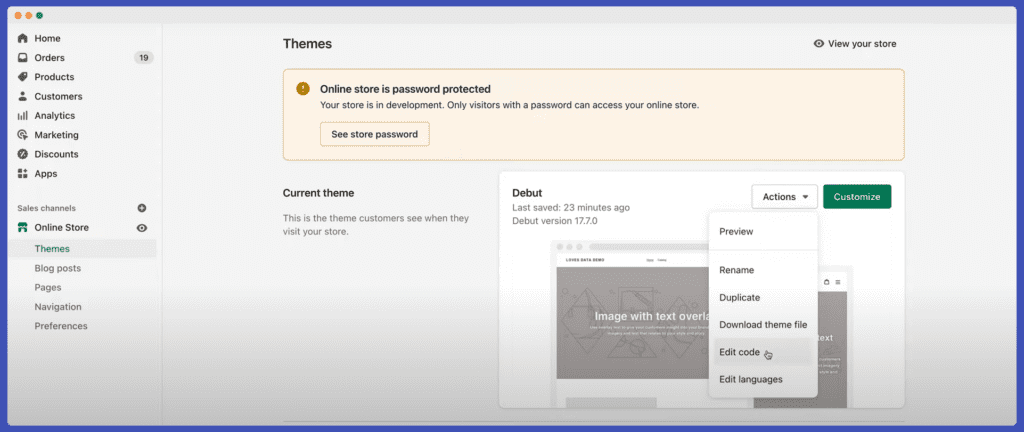
You will enter your store, then you will go to the Online Store, then choose Themes, then from Actions you will choose Edit code.
Then you will choose Theme.liquid exactly as it is located in the image below.

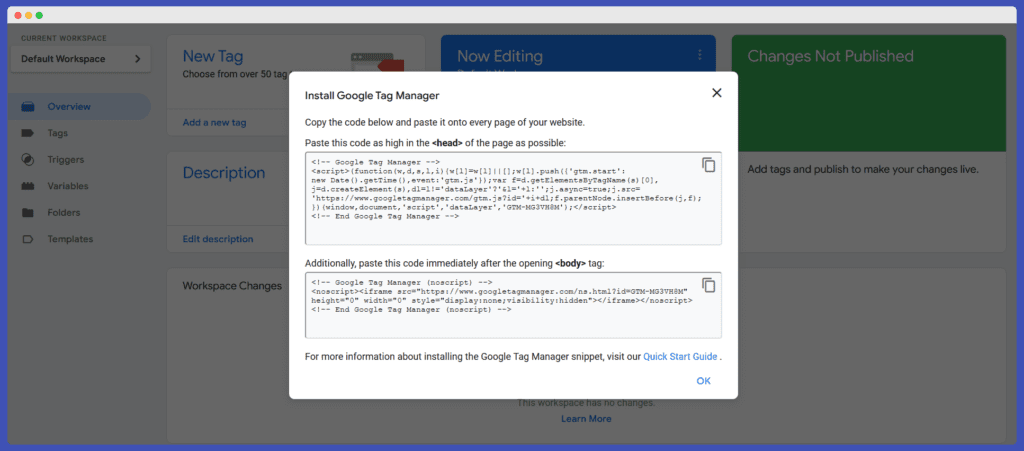
In the next step, we will add your code to Google Tag Manager, and we will also add an additional code called Data Layer, and through this code, Google Tag Manager will collect all the variables that occur during the purchase process.
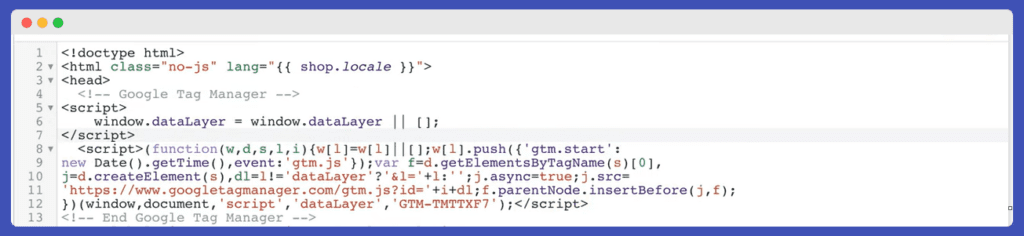
After the sign You will add the Date Layer code, which is a fixed code that you can use on all your stores on Shopify
window.dataLayer = window.dataLayer || [];
Then you will add your Google Tag Manager code, as shown in the image above, and then click save.
How to add Google Tag Manager Data Layer to the Shopify order confirmation page
You will go to settings, this screen will appear as shown below, and you will choose checkout.

Then you will go to the Order status page, and this place helps you add tracking codes to the last page your user goes to.
You will add this code in the Order status page
window.dataLayer = window.dataLayer || [];
dataLayer.push({ ecommerce: null });
{% if first_time_accessed %}
dataLayer.push({
event: “purchase”,
ecommerce: {
transaction_id: “{{ order.order_number }}”,
value: {{ total_price | times: 0.01 }},
tax: {{ tax_price | times: 0.01 }},
shipping: {{ shipping_price | times: 0.01 }},
currency: “{{ order.currency }}”,
items: [
{% for line_item in line_items %}{
item_id: “{{ line_item.product_id }}”,
item_name: “{{ line_item.title | remove: “'” | remove: '”' }}”,
currency: “{{ order.currency }}”,
price: {{ line_item.final_price | times: 0.01 }},
quantity: {{ line_item.quantity }}
},{% endfor %}
]
}
});
{% endif%}
(function(w,d,s,l,i){w[l]=w[l]||[];w[l].push({‘gtm.start’:
new Date().getTime(),event:'gtm.js'});var f=d.getElementsByTagName(s)[0],
j=d.createElement(s),dl=l!='dataLayer'?'&l='+l:”;j.async=true;j.src=
'https://www.googletagmanager.com/gtm.js?id='+i+dl;f.parentNode.insertBefore(j,f);
})(window,document,'script','dataLayer','GTM-EXAMPLE');
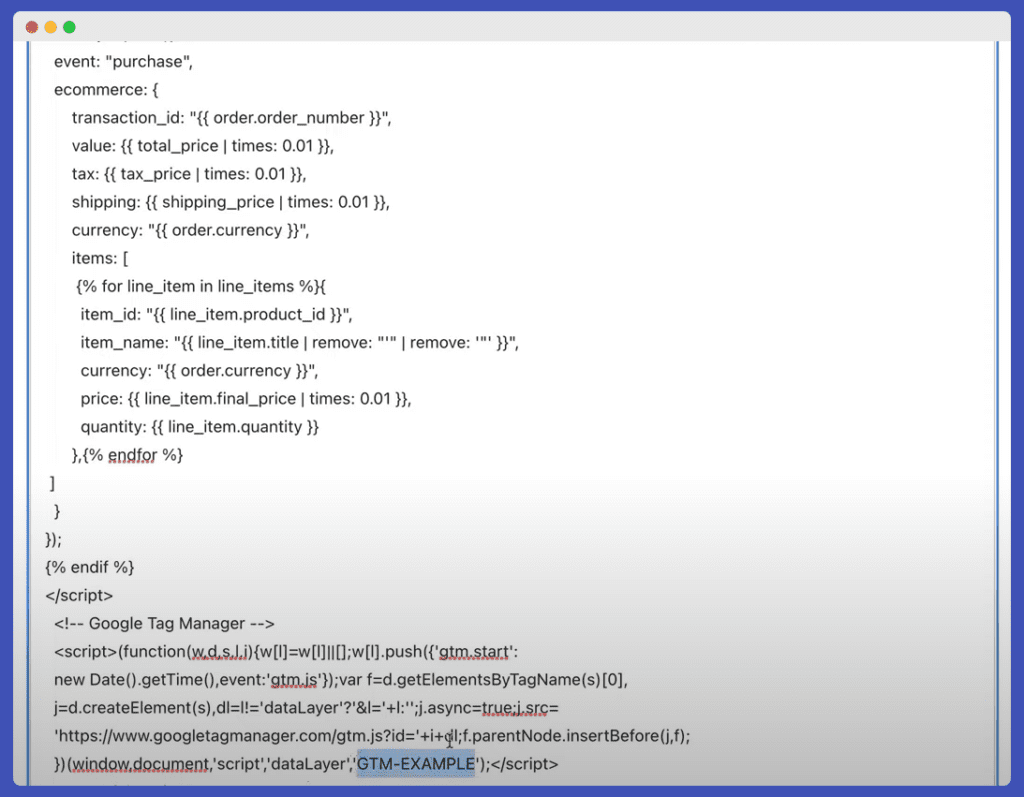
After adding this code as in the picture, you will replace the highlighted tracking code as in the picture with the tracking code for each in Google Tag Manager, which appears as in the picture below.
How to connect GA4 to Google Tag Manager
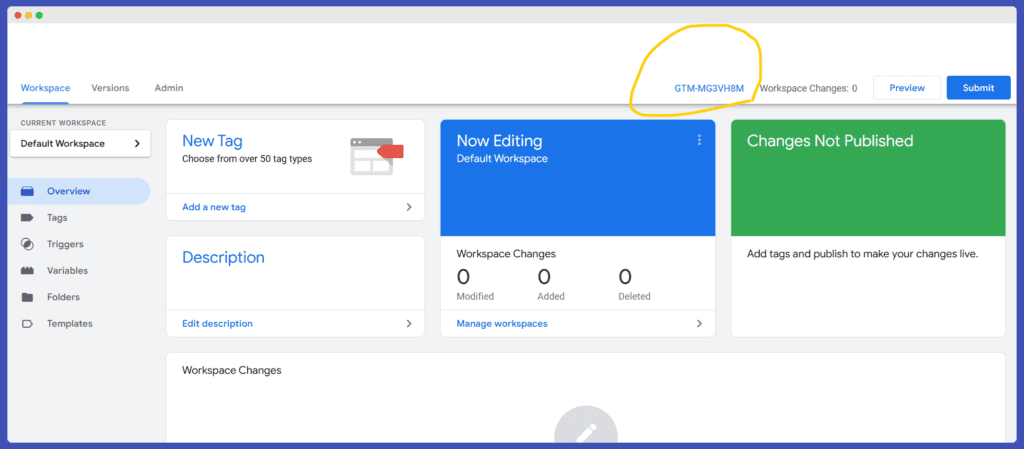
You will log in to Google Tag Manager GTM again and click on Add New Tag, after which this screen below will appear.
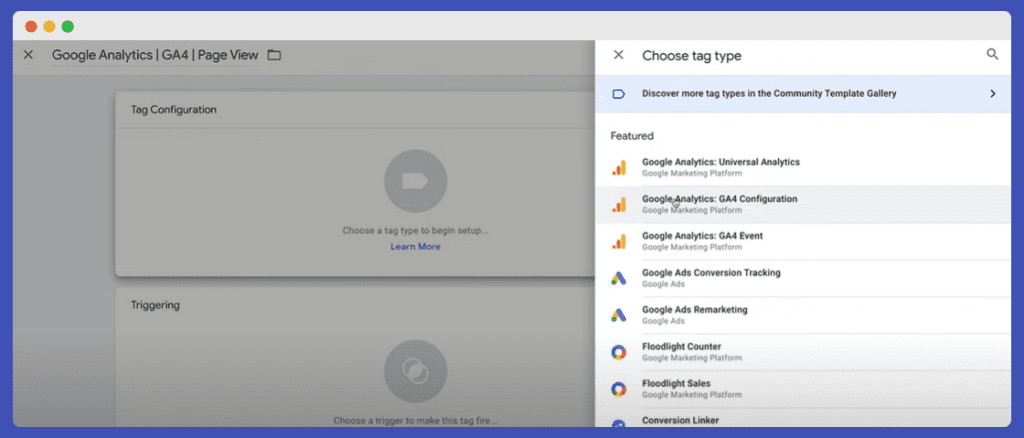
You will write the name of the TAG as shown in the name Google Analytics | GA4 | Purchase, then click on Tag Configuration and choose Google Analytics GA4 Configuration
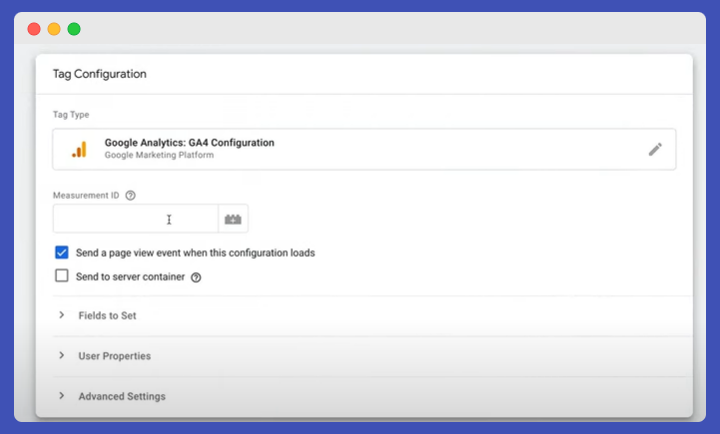
This screen will appear. Enter your Google Analytics code in the box MEASUREMENT ID, and you will find this code when entering GA4 Then you will click on Admin, then choose Data Streams, and then click on your domain. The tracking link will appear at the top as in the picture.

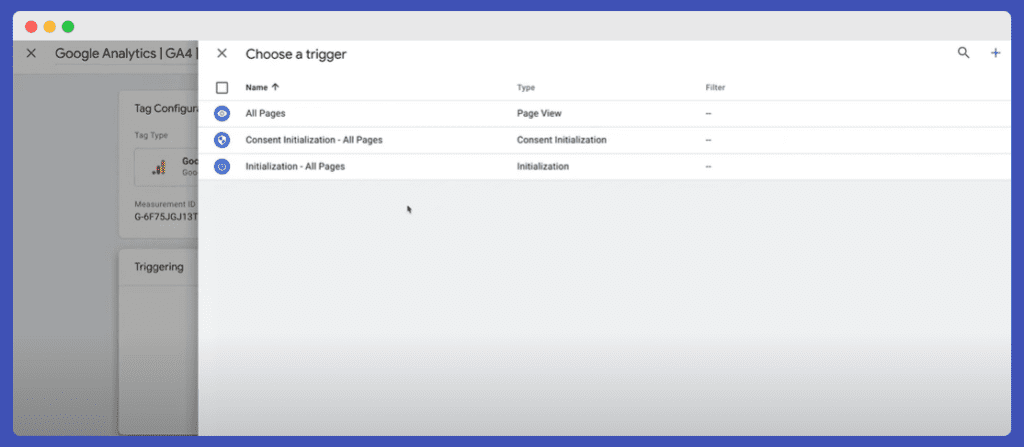
Then click on Triggering and choose All Pages as in the picture.
Then click Save and Publish
How to add variables for purchases within Google Tag Manager
In this step, we will add the variables whose details we want to send to GA4, and we will upload a ready-made file containing the programming codes that GTM needs to collect the data and send it to GA4.
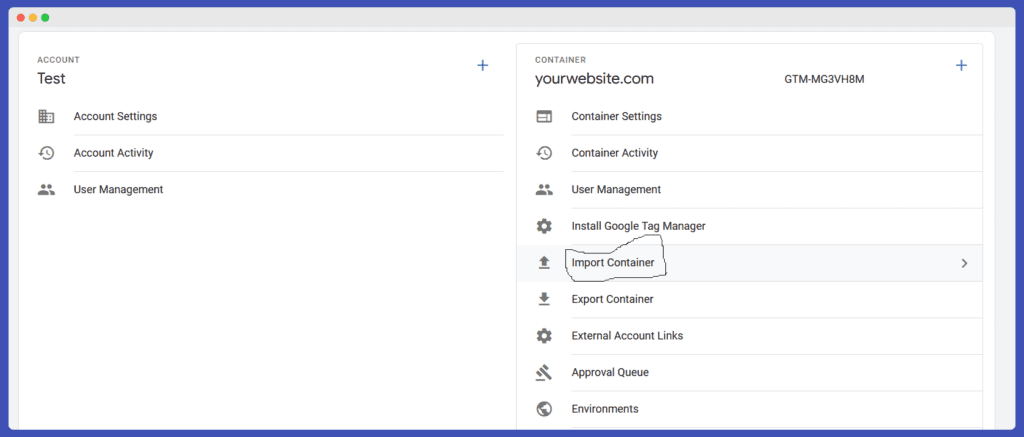
First, you will go to Admin and then choose Import Container
Then this screen will appear in front of you and you will add the steps below
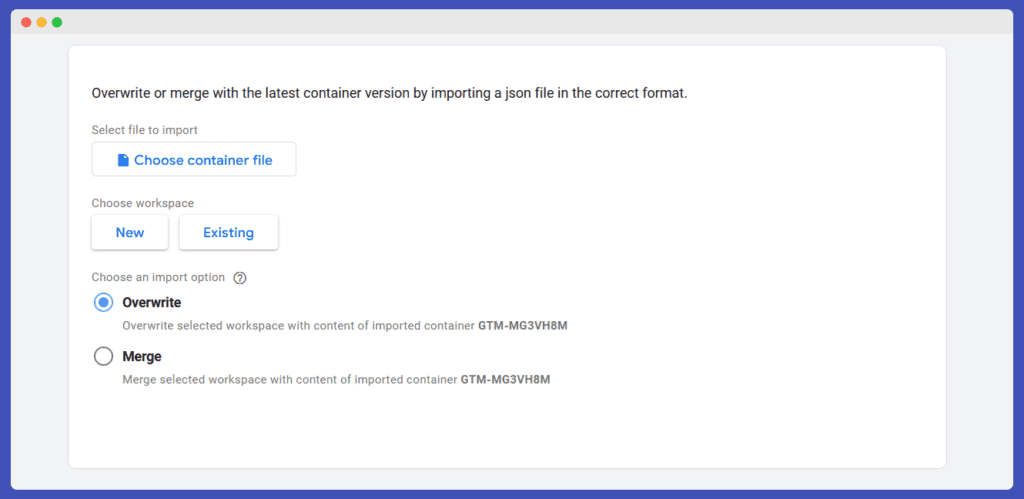
You will download this file” Link “And add it in the Choose container file box, and then you will click on Existing to choose your workspace. You will find it called Default workspace, and then you will choose Merge.
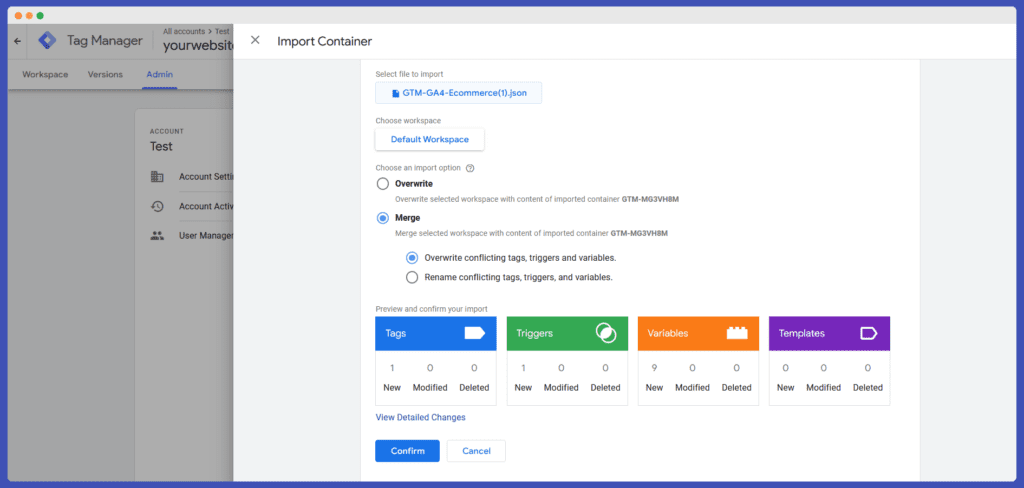
The screen will appear as follows, then click Confirm.
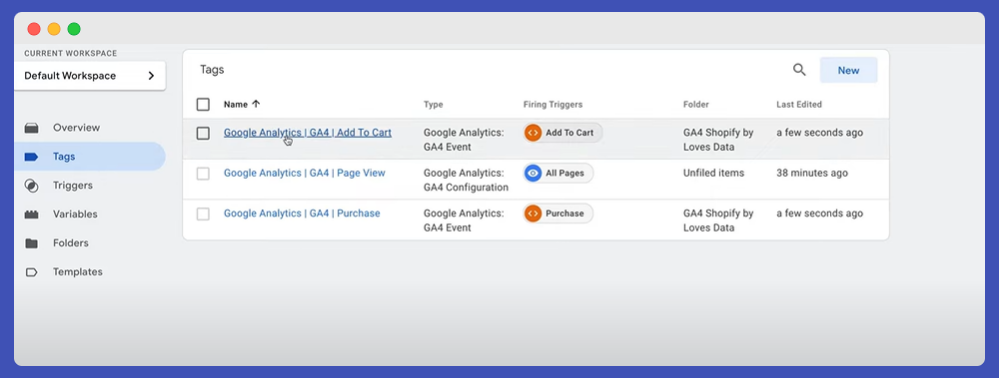
After going to Tags, all variables and codes that were added by the file that we uploaded to Google Tag Manager will appear.
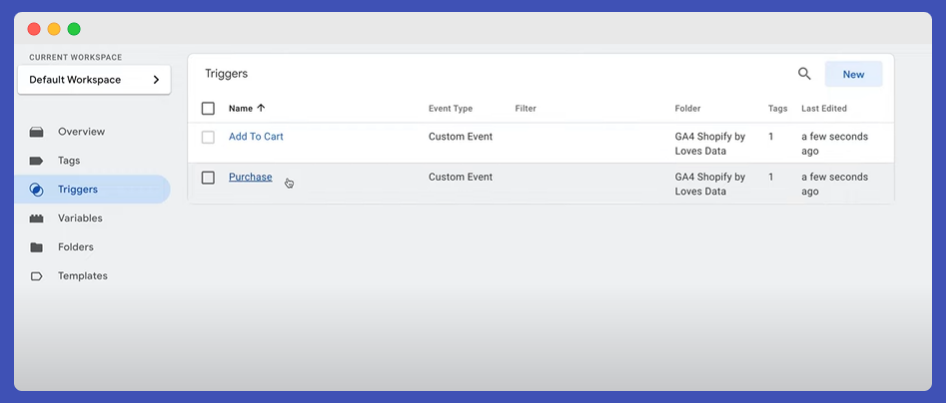
If you go to the Triggers field, you will find the goals that were set. When the user performs them, Google Tag Manager will send it as an event, and you will find its numbers in GA4.
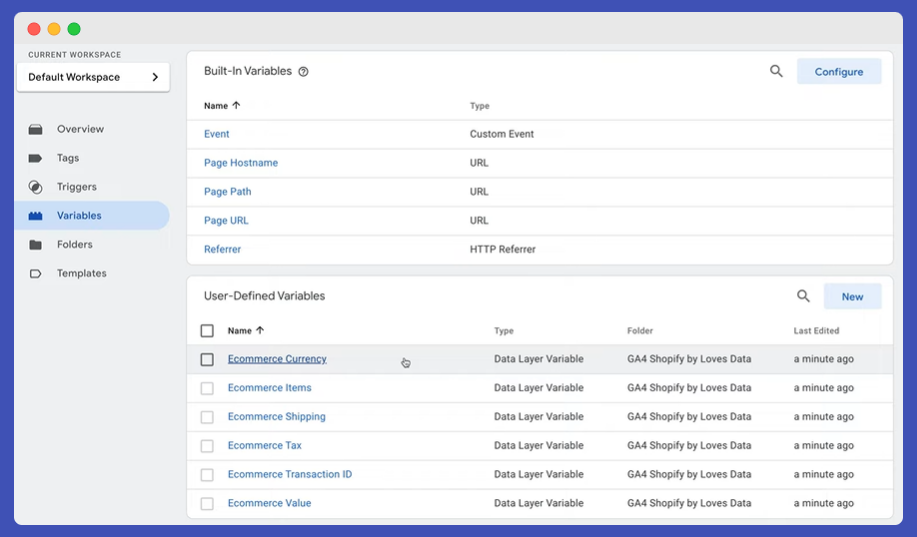
When you go to the Variables field, you will find the variables that will be sent to GA4.
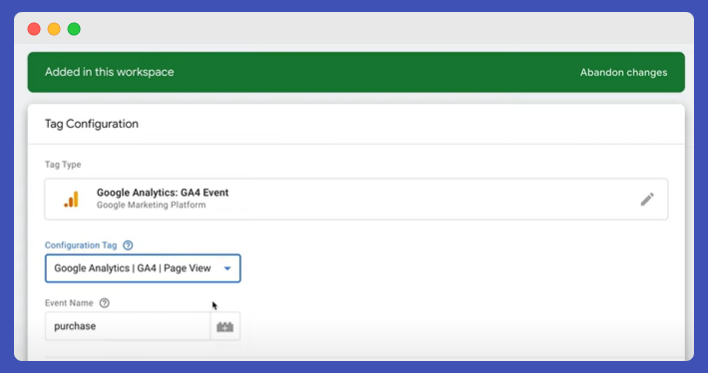
Now there is only one step left, which is to choose GA4 Configuration – Pageview within the Tags that we added.

You will click on the TAG called Google Analytics | GA4 | Purchase and you will choose the tag for GA4 as in the picture.
And so on in the TAG called Add To Cart, then click submit and then Publish.
Thus, we will have completed the settings for linking Google Tag Manager and Shopify, and sending the data to the new Google Analytics 4. If you have any questions, write them in the comments.
SEO Manager within the SEO company, I love helping everyone, and my advice to you is that your ability to solve any problem without fear of confrontation will get you as far as possible.